Building a Storefront using Context API in React

Hi there! 👋 I'm Bobate Olusegun, a Frontend Software Developer with a passion for building software that makes living less stressful. I also find pleasure in writing -- technical writing, UX writing, and story writing.
Sharing data across components is a vital feature of every React application. In React, we share data using the top-down approach (from parent to child's components) via props. However, there are situations whereby we need to share data between disconnected components (components at different nesting levels). It becomes difficult using props, as we would have to share data through several layers of components, even if those components don’t need the data. As a result, we can run into a state referred to as Prop Drilling.
In this article, we’ll learn how to use React Context API, why we need it, how it solves prop drilling, and how to build a mini-store with the ability to add or remove items from the cart, view all products, increment and decrement quantity of an item, and more.
To follow along with this tutorial, you need a basic knowledge of HTML, CSS, JavaScript, and React, any code editor of your choice, like Visual Studio Code, Node and npm should be installed on your computer.
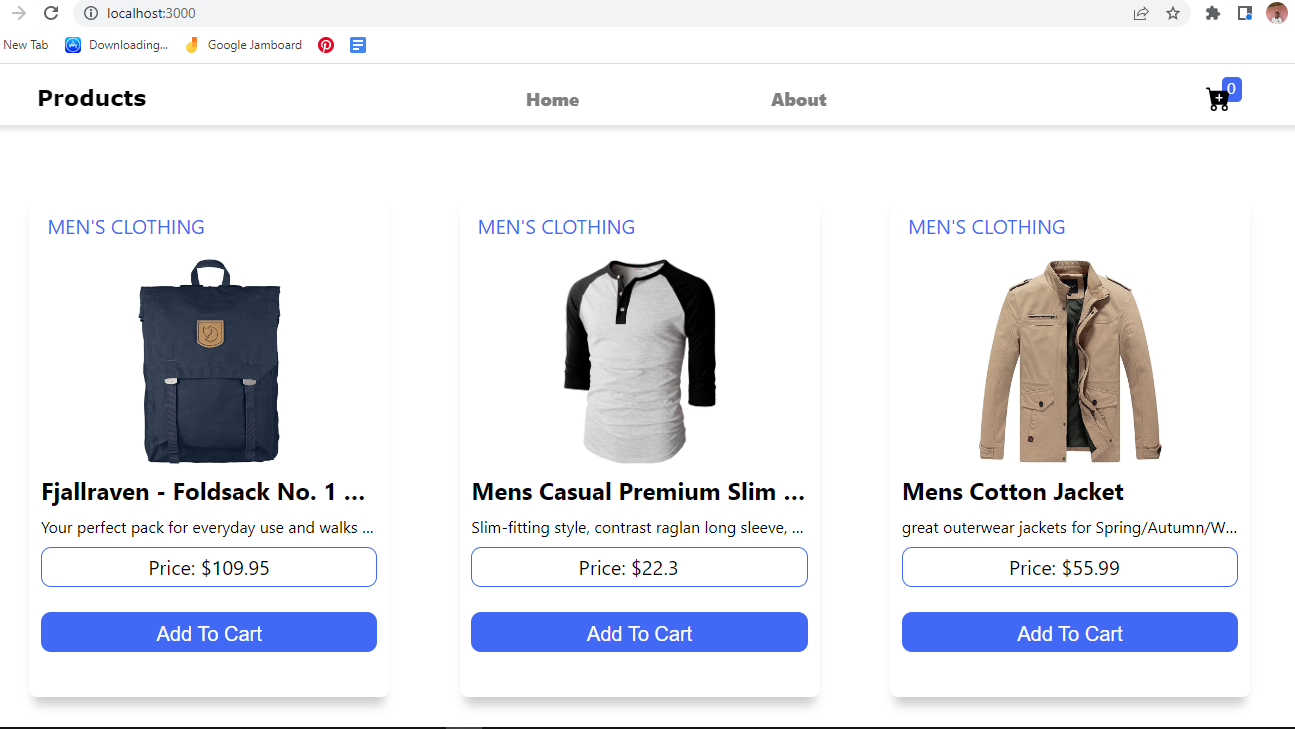
By the end of this tutorial, you will have built a replica of the snapshot below:
What is React Context?
React Context is the built-in method for managing local state or data created by the React team. It provides a medium for passing data between components by generating a store for the data which is then consumed by components that require it via importing the context.
When working with the components in React application, the naïve way of sharing data is by passing them through props. But the Context API is made so we do not have to send data via props. React Context is used to share data to many components. The main reason why we need the React Context is that it gets cumbersome passing data using a top-down approach when many components need that specific data.
Use cases of Context API?
Data stored and shared using React Context is global, such as:
- Theme (such as dark and light mode)
- User authentication (currently authenticated user)
- Data that does not require frequent updates
Levels of React Context
The React Context comprises three levels:
- Initializing the Context: We do this by calling the createContext() method, which creates a context object to which components can subscribe. The createContext() method returns a Provider component and a Consumer component when it is called.
- Declaring a Provider: This is using the Provider component from the context object created to give other components access to the context value.
- Declaring a Consumer: This is the component that gives us access to whatever context value has gotten via the Provider. We use this to display values (for example, the length of items in the cart) to users.
Building a sample application
We are going to start by creating a new React application using the create-react-app (CRA) bundler. Run the following command on your terminal and wait till you see happy hacking:
npx create-react-app mini-store
Once done, change the directory to the newly created React app then open your code editor by simply typing the following command into your terminal:
cd mini-store
code .  //only do this if you are using Windows and Vs code, otherwise open manually
By default, your new React application folder structure would look like this:
| - - node_modules
| - - public
|     | - - favicon.ico
|     | - - index.html
|     | - - logo192.png
|     | - - logo512.png
|     | - - manifest.json
|     | - - robots.txt
| - - src
|     | - - App.css
|     | - - App.js
|     | - - App.test.js
|     | - - index.css
|     | - - index.js
|     | - - logo.svg
|     | - - reportWebVitals.js
|     | - - setupTests.js
| - -.gitignore
| - - package-lock.json
| - - package.json
| - - README.md
Installing the needed dependencies
Dependencies needed:
React Icons
Install by typing the following code in your terminal:
npm install react-icons
- React Router
Install version 6 by typing the following code in your terminal:
npm install react-router-dom@6
This application comprises three different pages:
- Home page - This page showcases all items available.
- About page - This page displays the description of what this app is.
- Cart page - this is where all items added to the cart are displayed and managed
Before building the aforementioned pages, let’s first build out the building blocks of the pages, such as the header component on the home page.
To begin, create a new folder named components in the project's src folder. This will help us keep our components in a single place and also for easy debugging.
Inside this folder, create a new file and name it "Header.jsx" :
import React, {useState} from "react";
import '../App.css';
import { Link } from 'react-router-dom';
import { BsCartPlusFill } from 'react-icons/bs';
import { GiHamburgerMenu } from 'react-icons/gi';
import { MdClear } from 'react-icons/md';

const Header = () => {
  const [toggle, setToggle] = useState(false);
  const [showNav, setShowNav] = useState(false);
    return (
        <div className="Header-section">
            <div>
              <div className="nav-div">
                <p onClick={() => setShowNav(!showNav)} className="nav-icon">
                  {
                    showNav !== true ? <GiHamburgerMenu onClick={() => setShowNav(!showNav)}/> : <MdClear className="clear-nav" onClick={() => setShowNav(!showNav)}/>
                  }
                </p>
                <p className="product-name">Products</p>
              </div>
              <div className="resp-nav">
                {
                  showNav && (
                <nav className="nav-link">
                   <p>Home</p>
                   <p>About</p>
                </nav>
                  )
                }
              </div>
            </div>

            <nav className="nav-links">
              <p>Home</p></Link>
              <p>About</p></Link>
            </nav>

            <div>
               <p onClick={() => setToggle(!toggle)} className="cart-icon"><BsCartPlusFill/></p>
               <div className="cart-item"><span>0</span></div>
            </div>
        </div>
     );
}

export default Header;
In other to keep things concise, have decided not to explain anything regarding the styling of the app in this tutorial. Just copy the styles from here and paste them into your App.css file.
Now, navigate to your "App.js" file and import the Header component:
import Header from './Components/Header';

function App() {
  return (
     <div>
        <Header/>
     </div>
  );
}
We should have our Header component displayed when we start the application:

Let’s move on to building our home page and product card component.
On the home page, there would be different product cards spanning various categories. The product cards are structured in a different component called ProductCards, which is embedded in the directory named Components.
Let’s start by creating a file named "Home.jsx" inside the component folder.
Paste the following code in the newly created file:
import React from "react";
import '../App.css';
import { useState, useEffect } from "react";

const Home = () => {
    const [products, setProducts] = useState([]);
    const [pending, setPending] = useState(true);
    const productsAll =  async () => {
        const response = await fetch(`https://fakestoreapi.com/products`);
        const data = await response.json();
        setProducts(data);
        setPending(false);
    }

    useEffect(() => {
        productsAll();
    }, [])
    return (
       <div>
               {pending && <div className="loader"></div>}
            {
               products.length > 0
               ? (
                <div className="product-container">
                    {products.map((product) => (
                    <>
                        <ProductCard key={product.id} product={product}/>
                    </>
                    ))}
                </div>
              ) : (
                console.log("Data not found")
             )
          }
       </div>
     );
   }

export default Home;
In the code snippet above, we simply fetched data from the Fake Store Api and created the logic for a loader. The data fetched from the API would be passed as props to the component named ProductCard.jsx where the data will be used to generate the product images, product prices, and so on.
Note, remember to import the ProductCard component in order for the component to access the props passed to it.
Create a new file named "ProductCard.jsx" inside the component folder:
import React from "react";
import '../App.css';

const ProductCard = ({ product }) => {
    return (
        <div className="product-card">
           <p className="cartegory-text">{product.category.toUpperCase()}</p>
           <div className="image-container">
               <img className="product-image"src={product.image} alt=""/>
           </div>
           <div>
               <h2 className="title-text">{product.title}</h2>
               <p className="description-text">{product.description}</p>
           </div>
           <div className="price-text">
             <p>Price: {'$' + product.price}</p>
           </div>
           <div
                <button className="cart-button">Add To Cart</button>
           </div>
        </div>
     );
}

export default ProductCard;
This component takes a prop of the overall data gotten from the fetched result. The product card is structured in this component.
Next, create a new folder called ProductPages inside the src directory. In this folder, create an "About.jsx" file. here, we would just embed a little text description of the web app.
Here is the code for this component:
import React from "react";

const About = ( ) => {
    return (
        <div className="about-text">
            <h1>About Page</h1>
            <p>Thi is a mini store to practice how React Context API Works</p>
        </div>

     );
}

export default About;
So far, we have created the main structure of the web app, but we still need to enable the nav links to be active.
First, navigate to the "App.js" file and update it with the code below:
import { BrowserRouter as Router, Routes, Route } from "react-router-dom";
import Header from './Components/Header';
import Home from './Components/Home';
import About from './ProductPages/About';
import './App.css';

function App() {
  return (
    <Router>
      <div>
        <Header/>
        <Routes>
          <Route path="/" element={<Home/>}/>
          <Route path="/about" element={<About/>}/>
        </Routes>
      </div>
    </Router>
  );
}

export default App;
If you get an error after updating the App.js file, it simply means you didn’t install the router dependency. Scroll to the installing the needed dependencies section of this tutorial and install the needed dependencies.
Next, activate the nav links in the Header component by updating your "Header.jsx" using the code below:
import React, {useState} from "react";
import '../App.css';
import { Link } from 'react-router-dom';
import { BsCartPlusFill } from 'react-icons/bs';
import { GiHamburgerMenu } from 'react-icons/gi';
import { MdClear } from 'react-icons/md';
import { useStateValue } from "../CartPath/context";

const Header = () => {
  const { cartObject } = useStateValue();
  const [toggle, setToggle] = useState(false);
  const [showNav, setShowNav] = useState(false);
  console.log(cartObject);
    return (
        <div className="Header-section">
            <div>
              <div className="nav-div">
                <p onClick={() => setShowNav(!showNav)} className="nav-icon">
                  {
                    showNav !== true ? <GiHamburgerMenu onClick={() => setShowNav(!showNav)}/> : <MdClear className="clear-nav" onClick={() => setShowNav(!showNav)}/>
                  }
                </p>
                <p className="product-name">Products</p>
              </div>
              <div className="resp-nav">
                {
                  showNav && (
                <nav className="nav-link">
                   <Link to="/" style={{textDecoration: 'none'}}><p>Home</p></Link>
                   <Link to="/about" style={{textDecoration: 'none'}}><p>About</p></Link>
                </nav>
                  )
                }
              </div>
            </div>

            <nav className="nav-links">
              <Link to="/" style={{textDecoration: 'none'}}><p>Home</p></Link>
              <Link to="/about" style={{textDecoration: 'none'}}><p>About</p></Link>
            </nav>

            <div>
              <Link to="/cart"><p onClick={() => setToggle(!toggle)} className="cart-icon"><BsCartPlusFill/></p></Link>
              <div className="cart-item"><span>0</span></div>
            </div>
        </div>
     );
}

export default Header;
Now, the web app is up and running and it’s time to set up the context.
Setting up Context API
While our application isn’t that bulky because of its limited functionality, there is little to no germane need for context API, but as our app scales and new functionality is implemented, a state manager would be the best solution to keep things organized.
Let’s integrate the Context API into our app to enable easy and well-organized data across various components.
Create a new folder named CartPath inside the src directory. In this newly created folder, create a new file named "context.jsx" to handle the logic for the context store.
Your context.jsx code:
import { createContext, useContext, useReducer } from "react";
import reducer from './reducer';

//creating a context object
const Context = createContext();

export const Provider = ({ children }) => {
    //defining the initial state
    const initialState = {
        cartObject: [],
        check: false,
    }
    //updating the cart object
    const [state, dispatch] = useReducer(reducer, initialState);


    //define the needed logic for the cart
    const addToCart = (payload) => {
        //define the action you want to pass
        dispatch({ type:'ADD_TO_CART', payload })
    }

    const removeFromCart = (id) => {
        //define the action to pass when we remove from cart
        dispatch({ type:'REMOVE_FROM_CART', id })
    }

    const increment = (id) => {
        dispatch({ type:'INCREMENT', id })
    }

    const decrement = (id) => {
        dispatch({ type:'DECREMENT', id})
    }

    const clearCart = () => {
        dispatch({ type:'CLEAR' })
    }

    const checkOut = () => {
        dispatch({ type:'CHECKOUT' })
    }

    return (
        <Context.Provider value={{
            cartObject: state.cartObject,
            addToCart,
            removeFromCart,
            increment,
            decrement,
            clearCart,
            checkOut,
            ...state,
        }}>
            {children}
        </Context.Provider>
    )
}

export const useStateValue = () => useContext(Context);

export default Context;
In the code snippet above, we imported the needed hooks after which we created the context object with the createContext() built-in method. This line of code creates a context state object under the hood.
Next, we created an initialState of the context store, which represents our cart's initial state. In the initialState object, we define the cartObject property to be an empty array and also a check property to a value of false.
Third, we use the useReducer hook to update our state. This hook accepts a reducer function and an initial state, which then returns a two-element array - the current state of the reducer and the dispatch for sending actions to the reducer. Now we define the various functions to handle the different cases of the cart.
We then created the context provider by using the Context.Provider method and also passed everything we want the other components to have access to through the value prop. This simply populates the context value and updates it.
And finally, we created a custom hook named useStateValue where we used the useContext hook to gain access to the context value.
In order for the various components that need data from the context to access them, we need to wrap the entire app with our Provider since that is where we passed the context value. The ideal and best place to use the Provider in wrapping the entire app is the index.js file though you can also do it in the "App.js" file.
Navigate to the "index.js" file and update the code with this:
import React from 'react';
import ReactDOM from 'react-dom/client';
import './index.css';
import App from './App';
import { Provider } from './CartPath/context';
import reportWebVitals from './reportWebVitals';

const root = ReactDOM.createRoot(document.getElementById('root'));
root.render(
  <React.StrictMode>
    <Provider>
      <App />
    </Provider>
  </React.StrictMode>
);

/** If you want to start measuring performance in your app, pass a function to log results (for example reportWebVitals(console.log))
 or send it to an analytics endpoint. Learn more: https://bit.ly/CRA-vitals
**/
reportWebVitals();
Now, all the components that need data from the context can access it since we have wrapped our App component with the Provider and all the components are sub-components of the App component.
Let’s create a file named "reducer.jsx" inside the CartPath folder.
The reducer function accepts two parameters:
- A state which can be an object or an array
- An action for modifying the state The reducer changes the state passed into it and returns a new copy for every action dispatched.
Inside the "reducer.jsx", paste the following code:
export const get_total = (cartObject) => {
    let get_total_price = cartObject?.reduce((amount, cartItem) => amount + cartItem.price * cartItem.quantity, 0);
    return { get_total_price};
}

//a reducer function takes two parameters: a state and an action
const reducer = (state, action) => {
    //we use the switch operator to define action type - the operator looks out for the various
    //type we defined in our context file
    console.log(action);
    switch (action.type) {
        case 'ADD_TO_CART':
            return {...state, ...get_total(state.cartObject), cartObject: [...state.cartObject, { ...action.payload, quantity:1}]};
        case 'REMOVE_FROM_CART':
            let newCartObject = [...state.cartObject];

            const remove_id = state.cartObject.findIndex((cart) => cart.id === action.id);

            if (remove_id >= 0) {
                //since the em exists in the context - let's splice the whole array
                newCartObject.splice(remove_id, 1);
            }
            return {...state, ...get_total(state.cartObject.filter((cart_item) => cart_item.id !== action.id)), cartObject: newCartObject}
        case 'INCREMENT':
            //here we want to target the particular item and increment the quantity
            const item_id = state.cartObject.findIndex((cart) => cart.id === action.id);
            state.cartObject[item_id].quantity++;
            return {...state, ...get_total(state.cartObject), cartObject:[...state.cartObject]}
        case 'DECREMENT':
            //here we want to target the particular item and decrement the quantity
            const reduce_id = state.cartObject.findIndex((cart) => cart.id === action.id);
            state.cartObject[reduce_id].quantity--;
            return {...state, ...get_total(state.cartObject), cartObject:[...state.cartObject]}
        case 'CLEAR':
            return { cartObject: [], ...get_total([]),}
        case 'CHECKOUT':
            return { cartObject: [],check: true, ...get_total([]),}
        default:
            return state
    }
}

export default reducer;
In the code above, we performed six actions using the switch operator:
addToCart (case 'ADD_TO_CART'): In this case, we returned the entire state using the spread operator (this helps us not to lose anything in the state), the total price of items in the cart by passing the current
cartObjectof the state as a parameter to theget_totalfunction, and the updated version of the cartObject where we passed what was in thecartObject, the new item added to cart and initialized quantity as one.removeFromCart (case 'REMOVE_FROM_CART'): In this case, first we assigned everything in the
cartObjectto a variable namednewCartObject. We then used thefindIndex()method to get the id of the item we want to remove since we passed the payload id to ourremoveFromCartfunction in "context.jsx". Next, we used the splice() method to return all the items in thecartObjectexcluding the one with the id we received (remove_id). We returned the entire state, passed a cartObject excluding the item deleted as a parameter to theget_totalfunction, and lastly assigned thecartObjectto a new value.Increment (case 'INCREMENT'): In this case, we used the findIndex() method to get the target item id, then we targeted that item and incremented it using the post-increment notation. We returned the state, the
get_totalfunction targeting thestate.cartObjectas the parameter, and reassigned thecartObjectto a new value of all items present in thestate.cartObjectusing the spread operator.Decrement (case ‘DECREMENT’): In this case, we used the
findIndex()method to get the target item id, then we targeted that item and decremented it using the post-decrement notation. We returned the state, theget_totalfunction targeting thestate.cartObjectas the parameter, and reassigned thecartObjectto a new value of all items present in thestate.cartObjectusing the spread operator.clearCart (case 'CLEAR’): We simply returned the property of
cartObjectassigning a value of an empty array and we also passed an empty array as the parameter of theget_totalfunction.checkOut (case ‘CHECKOUT’): Here, we returned the property of
cartObjectassigning a value of an empty array, assigned the property check to a value of true, and also passed an empty array as the parameter of theget_totalfunction.
Building the Cart
It’s time to build the cart page, as usual, navigate to the ProductPages folder and create two new files, "Cart.jsx" and "CartObj.jsx" respectively.
Let’s start the build with the "Cart.jsx" file:
import React from 'react';
import '../App.css';
import { Link } from 'react-router-dom'
import CartObj from './CartObj';
import { useStateValue } from '../CartPath/context';

const Cart = () => {
    const { cartObject, checkOut, check, get_total_price, clearCart } = useStateValue();
    return (
        <div className="cart-section">
            <div className='cart-header'>
                <p className='cart-description'>Cart Section</p>
                <p onClick={() => clearCart()} className='clear-cart'>Clear Cart</p>
            </div>

            <div className='cart-head'>
                <p className='total-item'>Subtotal: { cartObject?.length }</p>
                <p className='total-price'>Total Price: { '$' + get_total_price }</p>
                <button className="checkout-btn" onClick={checkOut}>Checkout</button>
            </div>

            {
                check && (
                    <div className='empty-cart'>
                        <h1>Thank you for patronizing us!</h1>
                        <p>Your order will get to you shortly</p>
                        <Link to="/">
                           <p onClick={clearCart}>Back to store</p>
                        </Link>
                    </div>
                )
            }

            {
                //If cart is empty display cart is empty, else display items added to cart
                <>
                    {
                        cartObject.length === 0  ? (
                            <h2 className='empty-cart'>Cart is Empty! Add Item</h2>
                        ) : (
                            <div className="cart-container">
                                {cartObject.map((product) => (
                                    <CartObj key={product.id} product={product}/>
                                ))}
                            </div>
                        )
                    }
                </>
            }
        </div>
    )
}

export default Cart;
In the "Cart.jsx", we imported the custom hook created in the "context.jsx" file and the CartObj component we created. We used the custom hook to get five values from the context store using the destructuring concept. And lastly, we mapped through the cartObject and passed the mapped value as props to the CartObj component.
Next, let’s complete the build by navigating to the "CartObj.jsx" file and paste the code below:
import React from 'react';
import '../App.css';
import {RiDeleteBin6Line} from 'react-icons/ri';
import { AiFillMinusCircle } from 'react-icons/ai';
import { BsFillPlusCircleFill } from 'react-icons/bs';
import { useStateValue } from '../CartPath/context';
const CartObj = ({ product }) => {
    const { removeFromCart,increment,decrement } = useStateValue();
    return (
        <div className="cart-body">
            <div className="cart-segment">
                <div className="cart-product">
                    <div className="cart-image">
                       <img className="product-image" src={product.image} height="80px" alt={product.title}/>
                       <p className='product-title'>{product.title}</p>
                       <p onClick={() => removeFromCart(product.id)} className="delete-icon"><RiDeleteBin6Line/></p>
                    </div>

                    <div className="cart-number">
                        <p>{product.price} X {product.quantity}</p>
                        <p className='product-line'> | </p>
                        <p>{(product.price * product.quantity).toFixed(2)}</p>
                    </div>

                    <div className="cart-value">
                        <button className="minus-icon" onClick={() => decrement(product.id)}>
                            <AiFillMinusCircle/>
                        </button>
                        <p>{product.quantity}</p>
                        <button className="add-icon" onClick={() => increment(product.id)}>
                            <BsFillPlusCircleFill/>
                        </button>
                    </div>
                </div>
            </div>
        </div>
     );
}

export default CartObj;
Finally,
Update the initialState in the context.jsx file as follows:
const initialState = {
      cartObject: [],
      ...get_total([]),
      check: false,
}
Navigate to the "App.js" file and add the cart component as part of the route paths. Your "App.js" file should have the following code:
import { BrowserRouter as Router, Routes, Route } from "react-router-dom";
import Header from './Components/Header';
import Home from './Components/Home';
import About from './ProductPages/About';
import './App.css';
import Cart from "./ProductPages/Cart";

function App() {
  return (
    <Router>
      <div>
        <Header/>
        <Routes>
          <Route path="/" element={<Home/>}/>
          <Route path="/about" element={<About/>}/>
          <Route path="/cart" element={<Cart/>}/>
        </Routes>
      </div>
    </Router>
  );
}

export default App;
- In the Header component, we would dynamically update the number at the top right corner of the cart icon using the
cartobjectlength and also make our nav links clickable and linkable to the required pages. To do this, update your Header component by pasting the code below:
import React, {useState} from "react";
import '../App.css';
import { Link } from 'react-router-dom';
import { BsCartPlusFill } from 'react-icons/bs';
import { GiHamburgerMenu } from 'react-icons/gi';
import { MdClear } from 'react-icons/md';
import { useStateValue } from "../CartPath/context";

const Header = () => {
  const { cartObject } = useStateValue();
  const [toggle, setToggle] = useState(false);
  const [showNav, setShowNav] = useState(false);
  console.log(cartObject);
    return (
        <div className="Header-section">
            <div>
              <div className="nav-div">
                <p onClick={() => setShowNav(!showNav)} className="nav-icon">
                  {
                    showNav !== true ? <GiHamburgerMenu onClick={() => setShowNav(!showNav)}/> : <MdClear className="clear-nav" onClick={() => setShowNav(!showNav)}/>
                  }
                </p>
                <p className="product-name">Products</p>
              </div>
              <div className="resp-nav">
                {
                  showNav && (
                <nav className="nav-link">
                   <Link to="/" style={{textDecoration: 'none'}}><p>Home</p></Link>
                   <Link to="/about" style={{textDecoration: 'none'}}><p>About</p></Link>
                </nav>
                  )
                }
              </div>
            </div>

            <nav className="nav-links">
              <Link to="/" style={{textDecoration: 'none'}}><p>Home</p></Link>
              <Link to="/about" style={{textDecoration: 'none'}}><p>About</p></Link>
            </nav>

            <div>
              <Link to="/cart"><p onClick={() => setToggle(!toggle)} className="cart-icon"><BsCartPlusFill/></p></Link>
              <div className="cart-item"><span>{cartObject?.length}</span></div>
            </div>
        </div>
     );
}

export default Header;
- Activating the Add to Cart button in the ProductCard component.
import React from "react";
import '../App.css';
import { useStateValue } from "../CartPath/context";

const ProductCard = ({ product }) => {
  const { addToCart,cartObject } = useStateValue();
  //check if an item exists in the cart, return true
  const isInCart = (product) => {
    return !!cartObject.find((item) => item.id === product.id); //this returns a boolean value
  };
    return (
        <div className="product-card">
           <p className="cartegory-text">{product.category.toUpperCase()}</p>
           <div className="image-container">
               <img className="product-image"src={product.image} alt=""/>
           </div>
           <div>
               <h2 className="title-text">{product.title}</h2>
               <p className="description-text">{product.description}</p>
           </div>
           <div className="price-text">
             <p className="price-info">Price: {'$' + product.price}</p>
           </div>
           <div>
              {isInCart(product) && (
                <button className="cart-btn">In Cart</button>
              )}
              {!isInCart(product) && (
                <button onClick={() => {addToCart(product)}} className="cart-button">Add To Cart</button>
              )}
           </div>
        </div>
     );
}

export default ProductCard;
In the code above, we imported the custom hook - useStateValue from the "context.jsx" file. Next, we extracted the addToCart and cartObject from the context store using the custom hook. And finally, we created a function that checks if an item has been added to the cart. The function returns a boolean value.
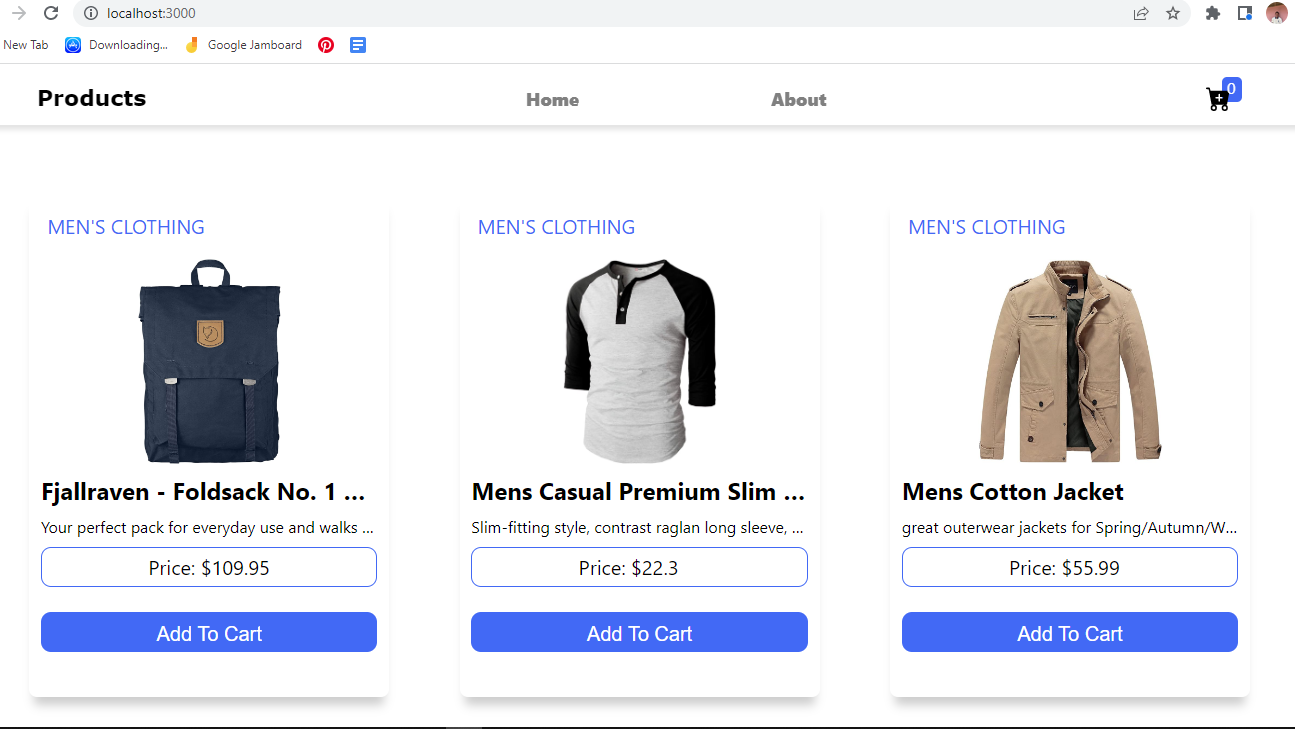
We have our final cart page:
Conclusion
That’s all for this project! I hope you found this article helpful as it gives you a solid understanding of the React Context API. You can take this app a step forward by adding new features like data persistence (saving the items with localStorage), authentication, and a lot more.
If you encounter any problem while building this web app, simply check out my source code here and then compare it with your code.
